Recent Water Damage Posts
Steps to Take When Your Basement Floods
10/16/2024 (Permalink)
 At SERVPRO, we are experts in water damage restoration.
Flooding in your basement can be a stressful and overwhelming experience. Whether caused by heavy rain, a burst pipe, or groundwater seepage, a flooded basement requires immediate attention to minimize damage and restore your home. At SERVPRO®, we understand the urgency of such situations, and we're here to guide you through the essential steps to take when your basement floods.
1. Ensure Safety First
Before doing anything else, prioritize safety. If your basement is flooded, there’s a chance that electrical hazards could be present. If you can safely access your circuit breaker, turn off the electricity to the affected area. If water levels are high or you're unsure of the situation, it’s best to avoid the basement until professionals can assess the risk. Once the electricity is off, you can safely begin addressing the situation.
2. Identify the Source of the Flooding
Understanding the source of the water is crucial to determining the appropriate course of action. Is the flooding due to external factors like heavy rainfall, or is it from an internal source such as a broken pipe or malfunctioning sump pump? Identifying the cause will help you decide whether you can stop the flow of water yourself or if you need to call in professional help immediately.
3. Remove Water and Dry Out the Area
Once it’s safe to do so, start removing the water as quickly as possible. If the flooding is minor, a wet/dry vacuum can be useful for extracting water. For larger floods, you may need to rent a pump or call in a professional water damage restoration company like SERVPRO®. After the water is removed, use fans, dehumidifiers, and open windows to begin drying out the area. The quicker you dry out your basement, the less damage your home will sustain.
4. Salvage What You Can
Not all items in your basement may be salvageable, but it’s important to act quickly to save what you can. Remove any furniture, appliances, and personal items from the waterlogged area. Items made of porous materials like wood, fabric, or paper are especially vulnerable to water damage, so prioritize moving them to a dry area. Once you’ve removed the items, assess what can be cleaned, dried, and restored, and what may need to be discarded.
5. Prevent Future Flooding
After dealing with the immediate crisis, take steps to prevent future basement flooding. Regular maintenance of your home’s drainage systems, such as clearing gutters and downspouts, can help prevent water from entering your basement. You might also consider installing a sump pump or improving your home's foundation drainage system. If you’re unsure of what’s best for your home, a consultation with a professional can provide you with tailored recommendations.
When your basement floods, quick action is essential to minimize damage and restore your home to its original condition. At SERVPRO, we are experts in water damage restoration, and we're here to help you every step of the way. If you need professional assistance, don’t hesitate to reach out to us. We're ready to make it "Like it never even happened."
Flood Barriers and Sandbags: Effective Techniques for Flood Defense
9/11/2024 (Permalink)
 Proactive measures and timely action are essential in minimizing the impact of floods.
Flooding is one of the most devastating natural disasters, causing significant damage to homes, businesses, and infrastructure. As a SERVPRO® employee, I've seen firsthand the impact floods can have on communities. Fortunately, there are effective techniques to mitigate flood damage, with flood barriers and sandbags being two of the most reliable methods for flood defense.
Flood Barriers
Flood barriers, also known as flood walls, are specially designed structures that prevent water from entering protected areas. These barriers come in various forms, including temporary and permanent solutions. Temporary flood barriers, such as water-filled barriers or modular systems, are ideal for quick deployment during imminent flood threats. They are lightweight, easy to assemble, and can be placed strategically around homes or properties to divert water flow. Permanent flood barriers, on the other hand, are typically constructed from concrete or steel and offer long-term protection for high-risk areas. These barriers require more planning and investment but provide robust defense against recurrent flooding.
Sandbags
Sandbags are another widely used and effective method for flood control. They are inexpensive, readily available, and can be deployed quickly in emergency situations. Sandbags work by creating a barrier that absorbs and diverts water away from vulnerable areas. When filled with sand or soil, they form a solid wall that can hold back rising floodwaters. To maximize their effectiveness, it’s crucial to stack sandbags properly. Start by placing a plastic sheet or tarp on the ground to act as a moisture barrier. Then, stack the sandbags in a staggered brick pattern, ensuring each bag is tightly packed and overlaps the one below it. This method creates a more stable and impermeable barrier.
While sandbags are effective, they do have limitations. They are labor-intensive to fill, transport, and place, and they can deteriorate over time, especially when exposed to water for extended periods. Additionally, sandbags may not provide a perfect seal, allowing some water to seep through. For these reasons, combining sandbags with other flood defense measures, such as flood barriers or sump pumps, can enhance overall protection.
Preparedness
Preparation is key to effective flood defense. Assessing the flood risk in your area and having a flood defense plan in place can make a significant difference. Consider investing in both temporary and permanent flood barriers if you live in a high-risk area. Keep a stockpile of sandbags and other flood defense materials readily available, and practice deploying them with your family or neighbors to ensure everyone knows what to do when a flood threat arises.
At SERVPRO, we understand the importance of protecting your property from flood damage. By utilizing flood barriers and sandbags effectively, you can reduce the risk of flooding and safeguard your home or business. Remember, proactive measures and timely action are essential in minimizing the impact of floods. If you need assistance with flood preparation or recovery, SERVPRO is here for you.
Sustainable Restoration: Materials for Water Damage Restoration
6/13/2024 (Permalink)
 If you're in need of water damage restoration services, don't hesitate and give our SERVPRO of Southwest Raleigh/Holly Springs team a call today!
In the aftermath of water damage, rebuilding your home is an opportunity to not only restore but also improve its resilience and sustainability. Choosing the right materials for reconstruction can make a significant difference in the long-term durability and environmental impact of your home. In this blog post, we'll explore the importance of selecting sustainable materials for water damage restoration and provide guidance on choosing eco-friendly options that promote both environmental and personal well-being.
Why Choose Sustainable Materials?
When rebuilding after water damage, it's crucial to consider the environmental impact of the materials used. By opting for sustainable materials, homeowners can reduce their carbon footprint, conserve natural resources, and create healthier indoor environments for themselves and their families.
Key Considerations for Choosing Sustainable Materials
Recycled Content
Look for building materials that contain recycled content, such as recycled wood, metal, or plastic. Using recycled materials reduces the demand for virgin resources and diverts waste from landfills. Additionally, recycled content materials often require less energy to manufacture, further reducing their environmental footprint.
Renewable Resources
Choose materials made from renewable resources that can be replenished naturally, such as bamboo, cork, or sustainably harvested wood. These materials have a lower environmental impact compared to non-renewable alternatives and promote the responsible management of forests and ecosystems.
Low VOCs
Volatile organic compounds (VOCs) are chemicals found in many building materials that can off-gas and contribute to indoor air pollution. Opt for materials with low or zero VOC emissions to create a healthier indoor environment for your family. Look for certifications such as GREENGUARD or Cradle to Cradle to ensure that the materials meet strict indoor air quality standards.
Energy Efficiency
Choose energy-efficient materials that help reduce heating and cooling costs and minimize your home's overall energy consumption. Consider installing energy-efficient windows, doors, and insulation to improve thermal performance and reduce energy waste. Additionally, incorporating renewable energy systems such as solar panels can further enhance your home's sustainability and resilience.
Durability and Longevity
Select materials that are durable, long-lasting, and require minimal maintenance to reduce the need for frequent replacements and repairs. Investing in high-quality, resilient materials upfront can save you money in the long run and reduce the environmental impact associated with frequent renovations and replacements.
Examples of Sustainable Materials for Water Damage Restoration
- Recycled-content insulation made from recycled denim or fiberglass
- Bamboo or cork flooring sourced from renewable forests
- Low-VOC paint and finishes for interior walls and ceilings
- Energy-efficient windows and doors with double or triple-glazing
- Sustainable roofing materials such as metal, clay, or recycled rubber
By choosing sustainable materials for water damage restoration, homeowners can contribute to a more environmentally friendly and resilient built environment while creating healthier and more sustainable homes for themselves and future generations. If you're in need of water damage restoration services, don't hesitate and give our SERVPRO of Southwest Raleigh/Holly Springs team a call today!
9 Tips for Restoring Furniture After Water Damage
2/21/2024 (Permalink)
 Restoring water-damaged furniture demands prompt action and careful execution.
Water damage wreaks havoc on furniture, causing stains, warping, and deterioration. Salvaging water-damaged furniture requires immediate action and the right approach. Here are some practical steps and insights to help you salvage your furniture after a water loss:
1. Act Swiftly
Time is of the essence when dealing with water-damaged furniture. Begin the restoration process as soon as possible to prevent further deterioration. The longer furniture remains wet, the higher the chances of irreparable damage and mold growth.
2. Assess the Damage
Before initiating any restoration, carefully assess the extent of the damage. Check for water stains, warping, mold growth, and structural integrity issues. This evaluation helps determine the appropriate restoration methods for each piece of furniture.
3. Remove Excess Moisture
Start by blotting excess water using clean, dry towels or cloths. Avoid rubbing the affected areas, as it may worsen the damage. For wooden furniture, use a soft cloth to gently absorb moisture without applying excessive pressure.
4. Dry Thoroughly
Proper drying is crucial to prevent further damage and mold growth. Place water-damaged furniture in a well-ventilated area with adequate airflow. Utilize fans or dehumidifiers to expedite the drying process. For upholstered pieces, remove cushions and thoroughly dry them separately.
5. Clean and Sanitize
After drying, clean the furniture surfaces using a mild detergent or cleaning solution. This step helps remove dirt, grime, and any remaining traces of moisture. For wooden furniture, use a wood cleaner to restore its shine and luster.
6. Prevent Mold
Mold growth is a common concern after water damage. To prevent mold, use a mixture of water and vinegar or a commercial disinfectant to sanitize furniture surfaces thoroughly. Ensure proper ventilation during and after the cleaning process.
7. Address Wood Furniture
For wooden furniture, addressing warping or swelling is crucial. Gently reshape warped wood by applying pressure evenly across the surface. Avoid exposing wood to direct sunlight or heat, as it may cause further damage.
8. Consider Professional Assistance
Some severe water damage cases may require professional restoration services. If you're unsure about the best approach or if the damage is extensive, seek assistance from restoration experts, like SERVPRO of Southwest Raleigh/Holly Springs.
9. Monitor and Maintain
After restoration, keep a close eye on the furniture to ensure it's completely dry and free of mold. Regular maintenance, such as dusting and occasional cleaning, helps prevent future damage.
In conclusion, restoring water-damaged furniture demands prompt action and careful execution. By following these expert tips and taking proactive measures, you increase the likelihood of salvaging your furniture and minimizing the impact of water damage. Remember, patience and proper techniques are essential in the restoration process to preserve the integrity and beauty of your furniture.
Is Your Refrigerator Leaking? Signs to Watch Out For
7/24/2023 (Permalink)
 Addressing a leaking refrigerator quick can help prevent kitchen water damage.
Refrigerators play a crucial role in keeping our food fresh and preserving perishable items. However, a leaking refrigerator can be a cause for concern. Not only can it damage your kitchen floor or surrounding areas, but it may also indicate an underlying issue that needs attention. In this blog, we will discuss common signs that indicate your refrigerator is leaking and what steps you can take to address the problem.
Puddles or Water Stains
The most apparent sign of a leaking refrigerator is the presence of water puddles or stains on the floor near the appliance. If you notice water accumulating around the base of the refrigerator or spreading to adjacent areas, it's a clear indication that something is amiss.
Wet or Damp Interior
A leaking refrigerator may result in moisture buildup inside the unit. Check the walls, shelves, and drawers for any signs of wetness or excessive condensation. Damp or wet food items can also be an indicator of a leak.
Ice buildup inside the freezer beyond normal levels can be a sign of a leaking refrigerator. When the water from the defrost cycle doesn't drain properly, it can freeze and accumulate, leading to excessive ice formation.
Moldy or Unpleasant Odors
Moisture from a leaking refrigerator can create a conducive environment for mold and mildew growth. If you notice a musty or unpleasant odor coming from your refrigerator, it could be an indication of a hidden leak and subsequent mold development.
Unusual Sounds
While not directly related to leaks, unusual sounds like dripping, hissing, or gurgling coming from your refrigerator can be associated with a malfunctioning water line or a leak in the system. Pay attention to any unusual noises and investigate further if necessary.
Decreased Cooling Performance
A leaking refrigerator may affect its cooling efficiency. If you observe that the temperature inside the fridge or freezer is not as cold as it should be, it could be a result of a leak impacting the overall functionality of the appliance.
If your refrigerator has a water dispenser, a leak in the water line can cause problems. Check for water dripping from the dispenser or difficulty in obtaining water, as these issues may be linked to a leaking refrigerator.
Inspect the Water Supply Line
Check the water supply line at the back of the refrigerator for any cracks, loose connections, or signs of damage. Tighten or replace the line as necessary.
Clear Blocked Drain Tube. A clogged or frozen drain tube can cause water to back up and leak inside the refrigerator. Clear any blockages using a pipe cleaner or warm water to restore proper drainage.
Check the Door Seal
Faulty door seals can allow warm air to enter the refrigerator, leading to excess condensation and potential leaks. Inspect the seals and replace them if they are damaged or worn out.
Clean and Defrost the Freezer. Excessive ice buildup in the freezer can be a result of a leaking refrigerator. Turn off the unit, remove any food items, and allow it to defrost. Clean the freezer and ensure proper drainage after defrosting.
Seek Professional Help
If you're unable to identify or fix the source of the leak, it's advisable to contact a professional appliance repair technician. They have the expertise to diagnose and resolve complex issues associated with leaking refrigerators.
Detecting and addressing a leaking refrigerator in its early stages is essential to prevent further damage to your appliance and surrounding areas. By recognizing the signs of a leak and taking appropriate action, such as inspecting water supply lines, clearing blockages, and seeking professional assistance if needed, you can maintain the functionality and longevity of your refrigerator while avoiding potential water damage headaches.
What to look for to prevent a dishwasher leak
3/15/2023 (Permalink)
Your dishwasher may be leaking for one of several different reasons. The most common cause of leaks is a clogged drain hose or a cracked tub. You can check for these things by removing the bottom rack and looking at both ends of the drain hose.
Check water supply line
If you suspect that your dishwasher is leaking, look for a valve on the water supply line. If there is one and it's open, close it and then check for debris in the bottom of your dishwasher. If there isn't a valve, turn off power to your dishwasher by flipping off its breaker switch or pulling out its plug from an outlet (if possible). Then turn off water supply lines leading into your house by opening faucet handles until they're fully closed, if this doesn't work, call an electrician or plumber for help shutting down these lines permanently so that no more leaks can occur.
Check to see if the fill hose is connected to a water source.
To check if the dishwasher is connected to a water source, remove the drain hose from its connection point and see if there is water flowing through it. If there is not, then you have an issue with your plumbing or faucet, which will need to be addressed by a professional plumber.
If you can see that there is water flowing through the drain hose but nothing coming out of it when you open up your dishwasher door, this could mean that clogs have formed inside of both ends of your hoses. You'll want to remove these hoses from both locations before trying again. This time making sure each end has been cleaned thoroughly beforehand so as not introduce any more blockages into them.
Adjust the pressure switch on the back of the dishwasher.
The pressure switch is usually located on the back of your machine, but it could be in other places depending on your model. The pressure switch is usually a small plastic box with a simple dial inside it. To adjust this part, you'll want to turn the dial clockwise until you hear water rushing through your plumbing pipes or see steam coming out of them.
Level your dishwasher.
Make sure your dishwasher is level. If it's not, it may be leaking from the bottom. Check to make sure there's enough water in the dishwasher. If there isn't, add more until you hear a gurgling sound when you open and close the door (this indicates that all of the tubs are full). Inspect your connection between your faucet and drain hose to make sure they're tight by hand-tightening them if necessary--and then check again after running hot water through them for five minutes or so (it can help loosen up any corrosion).
Check for debris.
To check your drain hose, first remove it from the sink and examine it. Look for kinks or other obstructions in the hose that could be blocking water flow. Also look at the ends of your drain hoses, if they're cracked or have holes in them, you'll need to replace them right away.
If everything looks good with your drain hoses, move on to checking for leaks around their connections with other components. Leaks here can cause similar problems as clogs in your dishwasher's filters. If you suspect a dishwasher leak, give a plumber or the professionals at SERVPRO a call immediately to prevent secondary damages.
What Happens To Building Materials When Wet?
11/14/2022 (Permalink)
What To Do About Wet Building Materials
When a water loss occurs in your Raleigh, NC home or business, you want to know that your building materials are safe. It's our job to prevent damage to your property and belongings, but we also want you to understand how each material is affected by water.
One of the most common questions we hear when we talk to our customers is "What happens to building materials when they get wet?" The answer depends on the material and its condition. Let's take a look at what can happen to wood, concrete, drywall, finished wood, and the supporting structure when water enters your building.
Wood
Wood has a moisture content called MCF (moisture content). When wood absorbs water, it swells and loses strength. This can also cause warping or splitting depending on how much moisture is absorbed by the wood.
Wood can be saved or it can need to be replaced. Dry wood will shrink back to its original size and shape, but if it is left too wet for too long, the wood will swell and may need to be replaced. To save your wood furniture, place it in an area with good airflow and keep it there until the moisture has evaporated.
Concrete
Concrete tends not to absorb significant amounts of moisture from water damage events, so it's less likely than other materials to see any significant damage.
Drywall
The drywall product is made from sheets of paper covered with a gypsum plaster mix that is pressed between two pieces of wood, one on each side. When wet, this mixture will deteriorate quickly, but if it’s dried out within 24 to 48 hours it will be just fine. Drywall loses its paper but the gypsum board can be dried and saved. No need to replace it at all!
Finished Wood
When finished wood such as cabinets and hardwood floors are exposed to moisture, they can swell. This can cause them to warp, crack, split and peel. In some cases, it may be necessary to remove and replace these materials altogether:
- Cabinets can be removed from their baseboards and walls if they show signs of damage or if they're simply too damaged to repair. New cabinets may need to be custom-made by a qualified contractor in order to fit properly into existing openings (which will likely have been slightly altered from water damage). The good news is that once new cabinets are installed, you can use the same hardware on them as your old ones for a seamless transition into your new space!
- Flooring that has been warped by water damage should be removed as soon as possible so it doesn't continue warping even more over time—and potentially create cracks between boards that could allow insects or vermin access into your home's interior walls later down the road!
The Supporting Structure
The supporting structure of your home, the studs, joists, and sill plates, can remain intact. The studs and joists may be covered with drywall or other building materials on both sides of the studs. In some cases, they are only covered on one side with a layer of wood or metal trim. The sill plate is often covered by flooring material such as carpet or hardwood floors. The drywall will help to keep moisture out of those areas even though it doesn't always prevent water from entering the space between the insulation and studs/joists (as long as there isn't significant damage).
The Professionals Can Help
No matter the size of your building materials, we can help. Our equipment is designed to mitigate the damage to all of your building materials during a water loss. This means that you will get far more value out of your investment than if you went with any other company in town.
If you’re ready to work with people who care about restoring your property just as much as you do, then call SERVPRO of Southwest Raleigh/ Holly Springs today.
How To Make a Business Continuity Plan
8/10/2022 (Permalink)
Steps for Creating a Business Continuity Plan
Starting a business always comes with risk, and it is important to plan for any risks that are common in your industry. A business continuity plan is designed to help you plan for situations when business operations are disrupted for an extended period of time. Common risks include natural disasters, fires, water damage, and cyber attacks.
A business continuity plan is usually divided into four parts:
- Business impact analysis
- Recovery strategies
- Organization and teamwork
- Training and testing
This standardized model allows businesses to create comprehensive plans and adapt them to whatever industry they are involved in.
1. Conduct a Business Impact Analysis
You can complete an impact analysis by focusing on the business functions that would be immediately affected by a disaster. If you are not sure how to organize and develop this information, it is a good idea to use a template provided by a reputable source, such as Ready.gov, which is administered by the federal government.
2. Identify Recovery Strategies
Recovery strategies will depend on the industry you are in and the types of events you are planning for. Identify ways to quickly restore vital business functions in the aftermath of a disaster.
3. Use Organization to Develop an Emergency Response Plan
Divide employees into teams and define what each team's responsibilities will be during an emergency. Create plans for relocation if a building becomes unusable during disaster cleanup and restoration.
4. Develop Training and Testing Procedures
Create a training process for new employees and a schedule for reviewing emergency response procedures. Conduct testing to make sure the business continuity plan is meeting the needs of your business.
Following this four-part model will help you create a solid continuity plan for your business in Shearon Harris Nuclear Power Plant, NC. If your business experiences fire or water damage, contact a professional restoration company to address the issue promptly.
3 Facts About Water Damage
5/23/2022 (Permalink)
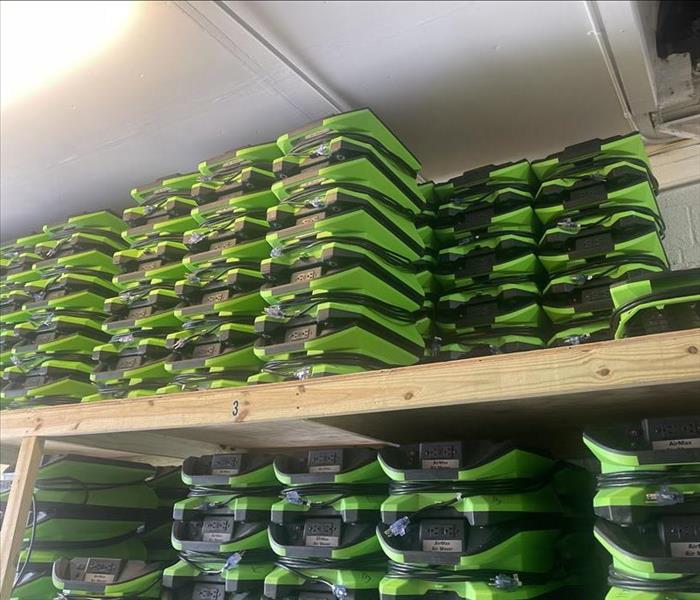
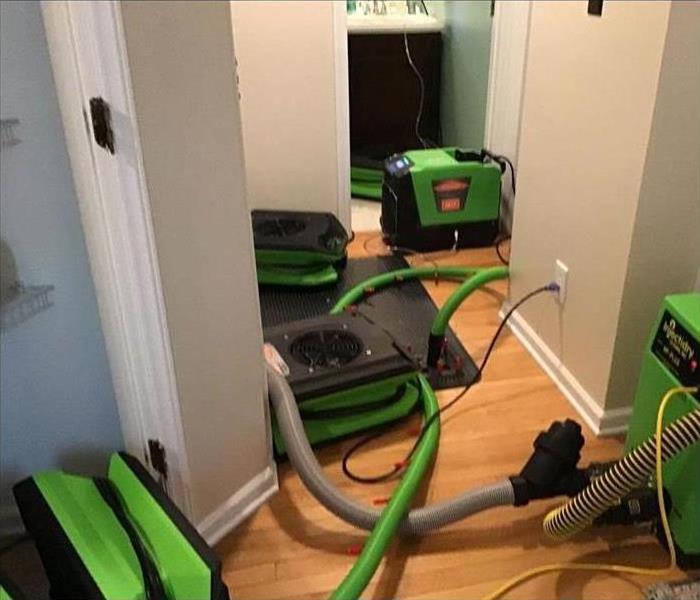 Drying equipment placed in a home due to water damage.
Three Water Damage Facts
As a Boylan Heights, NC, homeowner, you probably want to do all you can to avoid water damage and other problems a pipe burst can cause. Understanding how moisture can affect your home's building materials, systems and personal belongings is the first step to protecting your property from these types of incidents.
1. Flooding Causes Mold Growth
One issue you may not be aware of after a burst pipe floods a room is how quickly mold can appear in the aftermath. Mold spores that exist naturally inside your home thrive on humidity and moisture, something almost any type of indoor floods cause. Mold may appear as soon as 24-48 hours after the initial incident, but keeping humidity levels low with fans may slow this process.
2. Building Materials Absorb Water
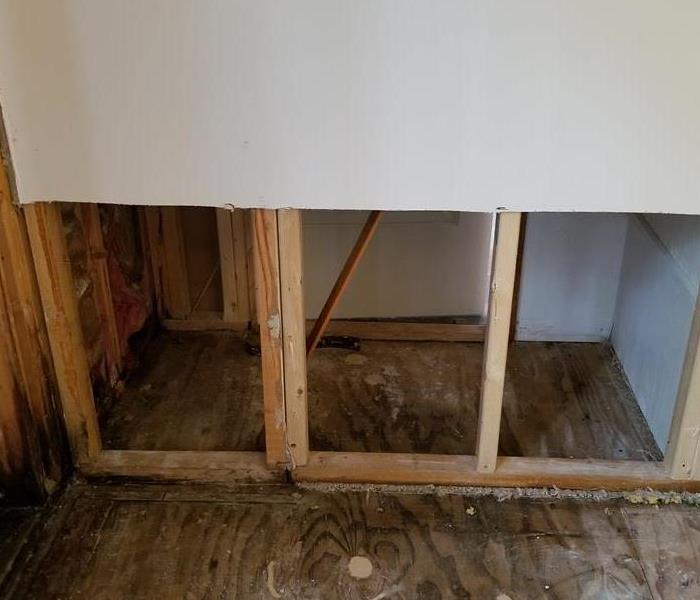
After a pipe or water line break, the walls, carpeting and even the insulation inside your home can absorb water. Drywall is especially porous and may grow mold that you cannot see. Ask your water restoration and mitigation company to perform a flood cut, which involves cutting into the wall about a foot above the flood line to examine the extent of the interior walls' damage. This can help you decide which sections can remain and which must be replaced.
3. Water Warps Wood
After a pipe bursts, the water that enters other rooms, such as your living room or home office, can warp wooden floors and furniture. You may want to remove wooden furniture from the flooded areas or close off flooded rooms so the water cannot reach areas with wood floors. You can use absorbent padding or towels to block the thresholds of rooms that have gaps between the door and the floor.
Floods with an indoor source, such as those caused by a pipe burst, are usually unexpected and it can be difficult to protect your Boylan Heights, NC, home if you are not aware of the damage can cause. Remaining in the know can help you remain prepared.
Why Preventative Maintenance of Your Commercial Plumbing System Is Important
3/28/2022 (Permalink)
Why Is It So Important to Maintain Your Commercial Plumbing System?
A commercial building needs proper maintenance in order to function properly. The plumbing system is no exception. You need to take care of your pipes, sewers and drains to avoid any plumbing problems. In fact, there are several benefits of being proactive with your plumbing system. Preventative maintenance:
- Keeps the pipes running properly
- Limits water temperature spikes
- Assures everything is up to code
- Prolongs the life of your system
How Does Preventative Maintenance Save Money?
Perhaps most importantly, being proactive can help you financially. After all, fixing a water main can be expensive. Specifically, a broken pipe may necessitate costly water damage repair services.
Emergency cleanups are typically more expensive than regular maintenance calls are. You should thus have a professional regularly inspect your Meredith College, NC, property for potential issues.
What Does Preventative Maintenance Entail?
The preventative maintenance should start with your pipes. The professional should look for signs of corrosion or leaks. He or she can also test the water pressure within the building. Low pressure could be a sign of sediment buildup or other plumbing problems.
However, the plumber you choose should not only look at your pipes. The drains, water heater and sewers should be inspected, as well. Slow drainage may indicate a clog deep in the system. A professional can use advanced cameras to locate the problem and then break up the clog with high-pressure jets.
Commercial bathrooms are common locations for leaks. Have someone check the seals and gaskets in the toilets. The caulking in the toilets and sinks should also be inspected.
Flushing the water heater is an important preventative maintenance step, as well. Best of all, you can do this yourself. A professional can also inspect various parts of the heater, including the vent pipes and burners.
Frequent inspections of your pipes, toilets, water heater, drains and sewers should prevent plumbing problems. Even a small leak can cause lots of damage, so being proactive about water issues is cost-efficient.
How to Prevent Toilet Overflow
2/10/2022 (Permalink)
Prevent a Toilet Overflow
Every homeowner in Bass Lake, NC dreads coming home to face a flooded toilet. Regardless of the toilet spurting clean or contaminated water into the bathroom, it requires a professional’s immediate help. The flooding may be a result of sewer damage causing waste to go back up through the pipes into the toilet. You can do a lot of good by preventing overflow before it happens by taking a few preventive measures.
1. Do Not Flush Random Items Down the Toilet
This is a particular concern in households with children, but even adults have been known to flush things down the toilet they should not. Some common items to keep out of there include:
- Napkins
- Papers
- Soaps
- Baby wipes
- Lotions
- Body creams
Flushing these items can cause them to get stuck in the pipes. Even things such as body cream, lotion and grease should stay out of toilets because they can harden through the pipes, causing a backup.
2. Clean the Toilet Regularly
In addition to keeping solid objects out of the toilet that can cause significant sewer damage, you also want to perform regular maintenance on the septic tank system. You should contact a sewage company once every eight years to clean and maintain your home’s septic tank. You can also clean your toilet routinely by using disinfectants and liquid detergent.
3. Avoid Flushing
Hopefully, the kind of toilet backup you will contend with will not be anything serious. Some toilets will merely overflow a little bit before receding. You may be able to clean up a small mess on your own, but you want to avoid flushing until you know the issue is resolved. Use a plunger to try to move the clog out of position. If nothing at your disposal seems to be working, then you should hire a professional plumber in Bass Lake, NC to come out and address the sewer damage.
How To Deal With Water Damage in Your Ceiling
1/28/2022 (Permalink)
What to Do If Your Ceiling Has Been Damaged By Water
When water gets into your Cameron Village, NC, home’s ceiling, it’s reasonable to worry about getting water in light fixtures among other potential issues. Ceiling damage can tricky to fix, but it is doable. Here are a few things you may want to know.
Know What to Look For
If you think there may be water damage in your ceiling there are a few things you can look for
- Discoloration in the ceiling surface
- Soft spots in the material
- Bubbling or warping of tiles, paint or surfacing
- Areas showing drip marks around the top of walls
- Condensation around light fixtures
Remember, if you think you may have water in or around a light fixture or fan, it’s important to turn the electricity to the area off.
Find the Source of the Problem
When investigating any problems with water in light fixtures it’s important to locate the source of the problem. In some cases, it may be a leak in the roof, but there’s also the possibility of a leaking pipe among other things. Finding the source will allow you to remedy the problem and prevent future issues.
Contact a Professional When Needed
In many cases, you may want to contact a local water damage restoration service to help conduct repairs. They should know how to find the source of the problem and make any repairs necessary. This team of professionals may also be able to help with leak and flood prevention, offer cleaning services, and some may even be able to work with your insurance company to help ensure that every step of the process goes smoothly.
When dealing with water in light fixtures and other ceiling damage it’s important to remember to put safety first. A professional should have the tools and knowledge necessary to do the job properly, so if you don’t feel comfortable handling the situation yourself it’s best to contact one in your Cameron Village, NC, area. It’s also important to locate the source of the problem so you can prevent future issues. Knowing what signs to look for may help.


 24/7 Emergency Service